
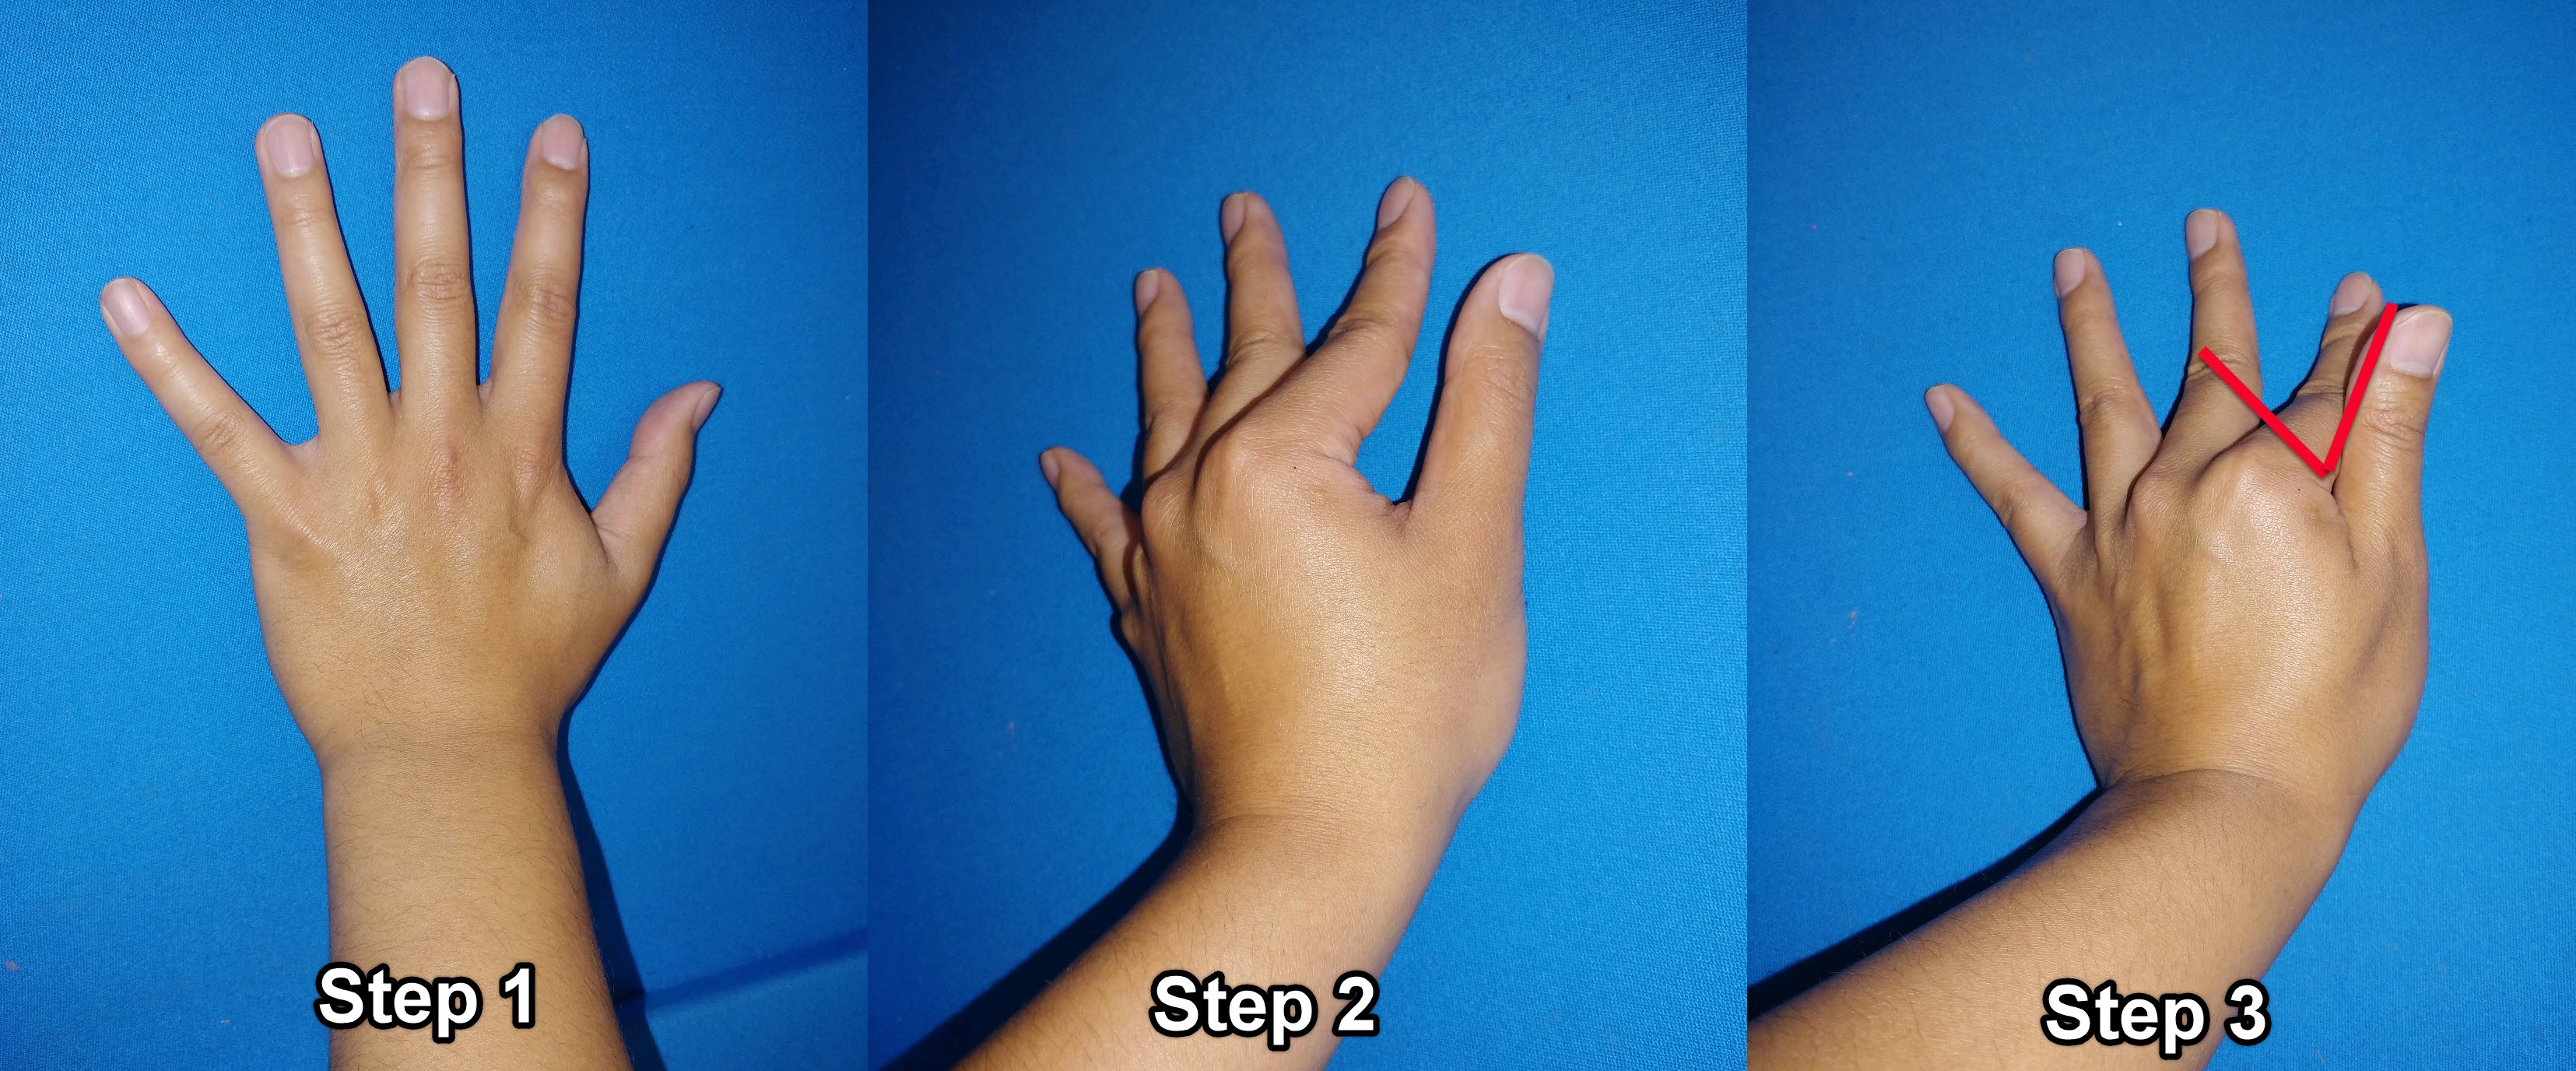
How do I make a hand bridge for pool or billiards?
Having a stable hand bridge is so important because it is one of the two physical contact points you are making with your pool cue. There is a huge number of different hand bridges and it’s about what you are most comfortable with. Normally, a hand bridge consists of your less dominant hand placed on the table and pushing your fingers together to create a “bridge” that your pool cue can use to strike a ball.
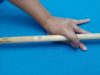
You can stabilize this bridge by pushing together your thumb against your finger (index, middle or ring finger depending on an open/closed bridge).
I’m right handed so my left hand is my bridge hand. Here you can see my thumb is pushed against my index finger and my cue is placed on the “V” bridge I’ve created. Be sure to place the cue in between where your thumb and index finger meet, and not the meaty part of your thumb as this will cause more friction and resistance.
A few tips to keep in mind:
- The palm of your hand is usually resting on the table
- Place cue on “V” between your thumb & finger
- Stable bridge that is not easily moved
- Steady and not shaking
- Cue has a smooth stroke on your bridge without resistance
So I bet you’re wondering, well what are open and closed bridges? and how do I form them?
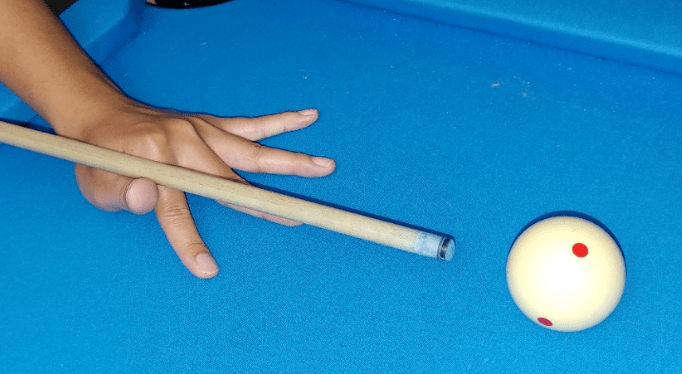
Learn the Open Bridge
The open bridge is one of the two very common bridges. You can form it by pressing your thumb against your index finger with your palm on the table.
Next, slowly move the rest of your fingers inwards until it’s reached a good elevation point to ensure you have a bridge where your cue can have a leveled position.
You should now have formed a”V” with the top of your index finger pressed against your thumb. This is an open bridge.
Here’s a shot of it with a pool cue on it.
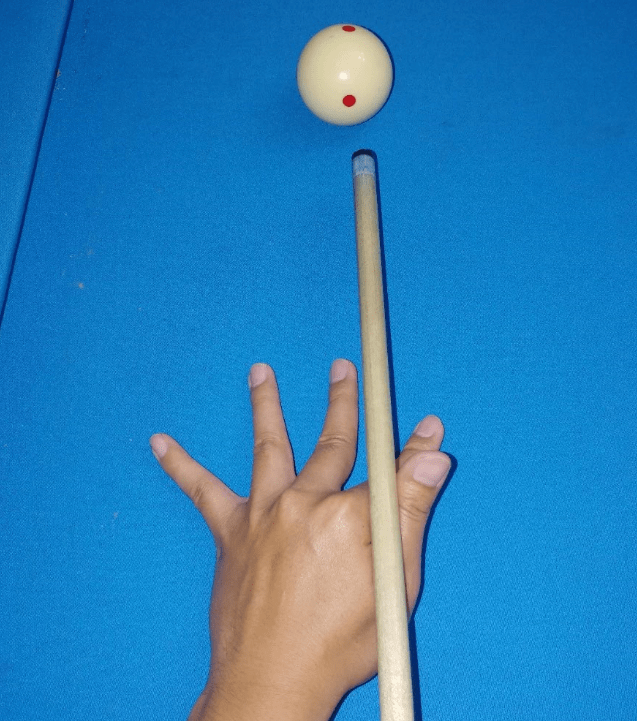
Learn the Closed Bridge
The closed bridge is probably the most common bridge you will see among pool players. It provides great stability and security of the pool cue. It is also a difficult one to master for beginners (for good reasoning).
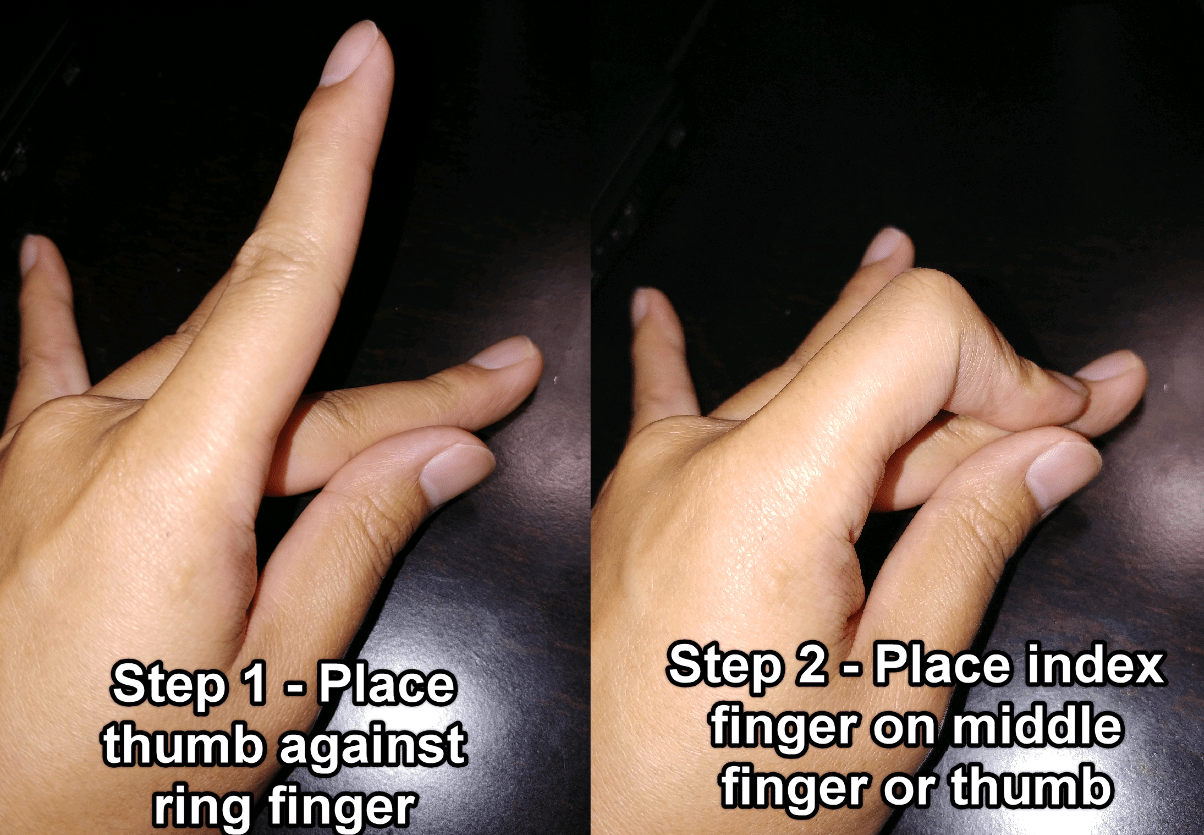
- Place your hand and move your thumb against your ring finger
- Then place your index finger on your thumb OR middle finger (preference)
The same applies where your palm is rested on the table.
Some players place their index finger in between the thumb and middle finger and that’s okay too.
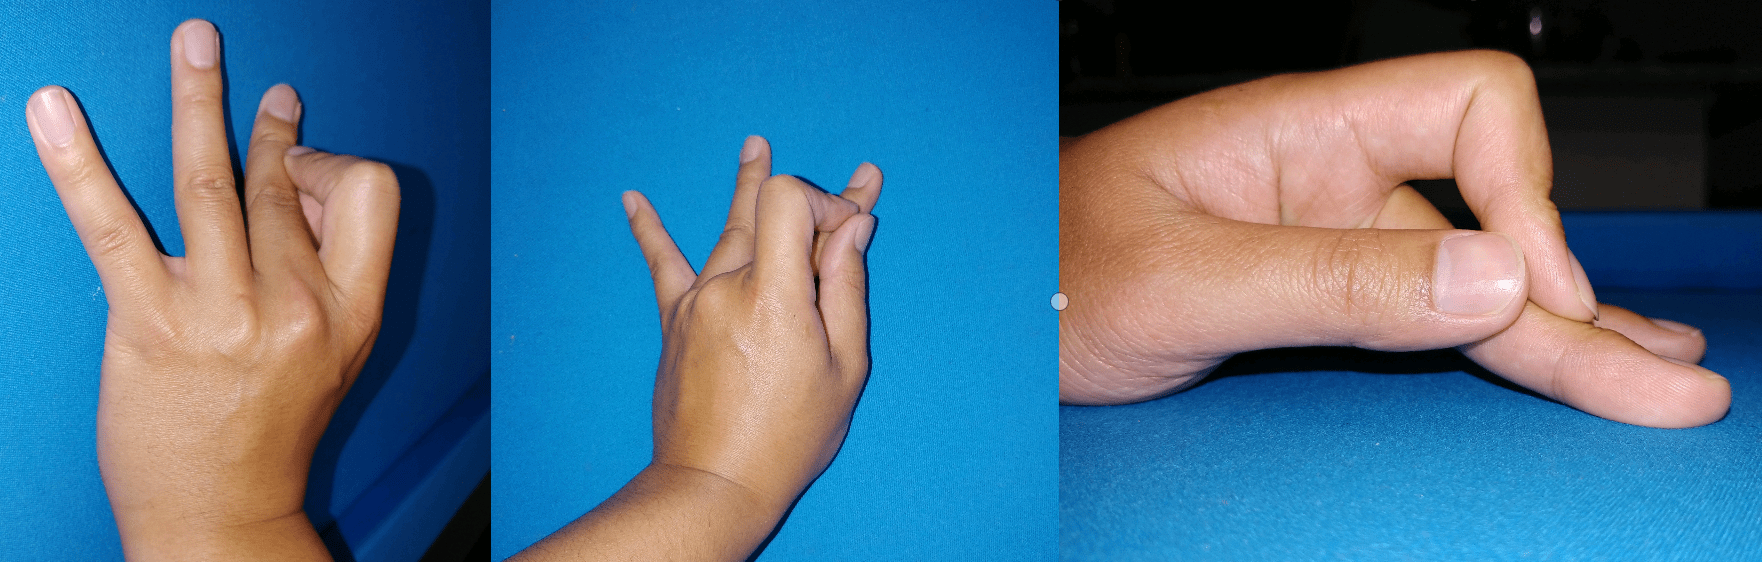
Here is another shot from different angles (notice my palm on the felt but the gap under my knuckles are not on the felt)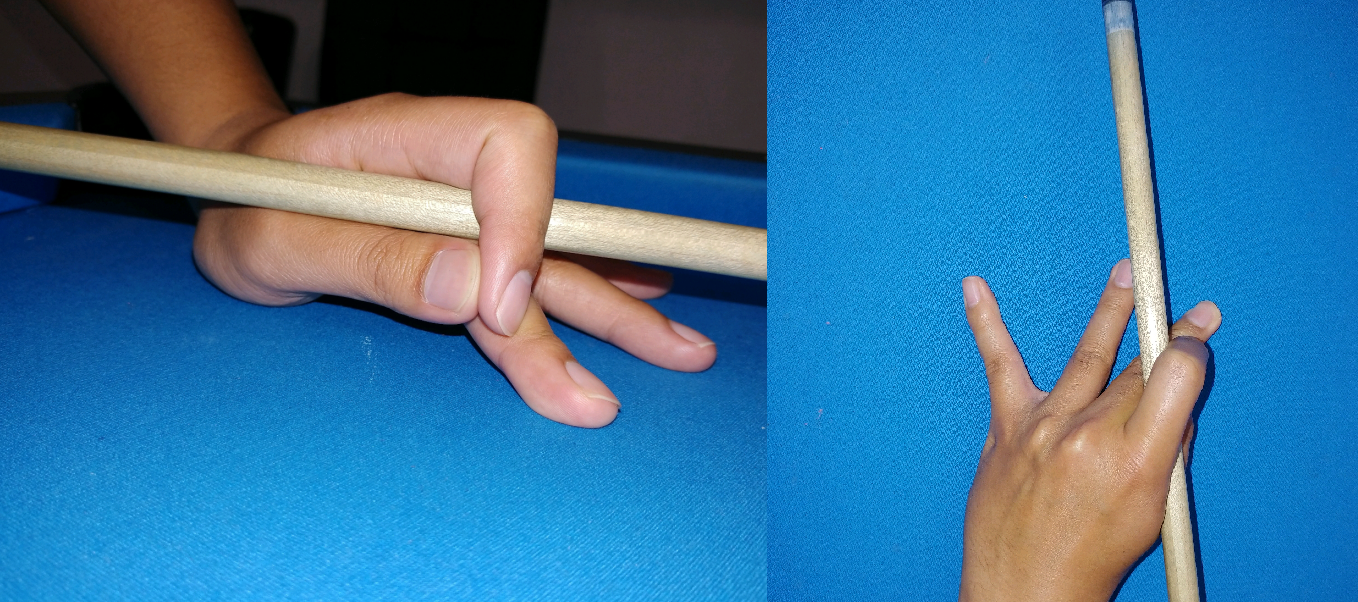
Note: There is no gap in my bridge with the cue in place.
It’s also easier to remember that the same “V” you created in an open bridge is the SAME “V” you will create in a closed bridge. The only difference is your index finger is placed above your cue.
Conclusion
It will feel uncomfortable and unnatural to you for a while. It may last for as short as a few days or as long as a few months. This varies from person to person, but stick it out for at least two weeks and if you are still unable to adapt, then change to a different style bridge that you are most comfortable with.
Once you’re able to form a hand bridge, you’ll want to work on your Grip, Stroke and Follow Through. Be sure to check out my post where I go over How to Hold a Pool Stick and cover how to properly stroke and grip the cue!
Thanks again for reading and I hope this helps you guys out!